Sunday, December 11, 2011

Aquatic Plant Nursery.

I have 7-different Aquatic Plants. Now after indulging myself in Aquatic grass, I thought of creating a Aquatic Plant Nursery which will serve as a back up in case my main tank goes hay way.


So I made used of my small 1-foot baby tank for preserving some of my aquatic plants.


Here a few pics:


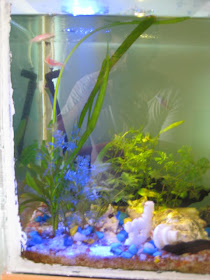
Front View: Cabomba, Cobra Grass, Microsword.

Top View.

3-strands of Java Moss were entangled to the roots of grass when I got them from the shop. I have tied them on to that shell. Keeping my fingers cross and hoping the Java Moss to bloom.   


Java Moss - Close up.

Time for a Lush Green Lawn.


Finally I got a place in Pune which is specialized in Aquatic Plants. I bought two kind of Aquatic Grass for that place.


1. Microsword (a.k.a. Dwarf Chain Sword, Pygmy Chain Sword, Lilaeopsis brasiliensis).


2. Cobra Grass (a.k.a. Lilaeopsis novae zelandia).


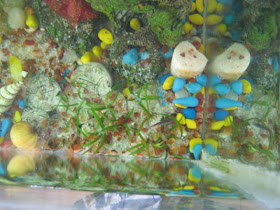
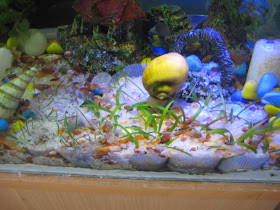
So here are some pics of my Aquatic Lawn.


Top-View of Lawn with Flash.


Top-View of Lawn without Flash.


Front View: The thicker grass on right is MicroSword and the thinner one on the left is Cobra Grass. The Snail is hardly 1.5 inch in Diameter.


Since my Sword and Anubias were infested with Algae, I got a Sucker Fish. The Sucker Fish (Pleco), though a lot creepy and Ugly, seems to be eating away the algae on my aquatic plant.

Saturday, December 10, 2011

Aquarium Setup using Walstad Method. - 7-Weeks

7-Weeks back, I has set up a Walstad Aquarium. 7-weeks had passed by and now the water had started looking yellowish. There were 2-major reasons for this yellowish water.


1. I had introduced, a blob of live tubifex worms in the tank. I just left them  in a plate inside the aquarium. As the worms die, a thin layer of biofilm is created, floating at the water surface. 


2. Introduced 4-pairs of Neon Tetra and 3 Pairs of Butterfly Guppies. This created a sudden increase in bio-waste, resulting in sudden burst in Ammonia and Nitrite and other water nutrients. This builds a classic case for Algae, which you can see on  Amazon Sword and Anubias.  


I immediately did a 20% water change and here are the results.


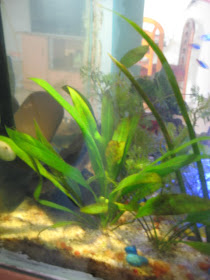
Finally the tall grass has shown some growth. A new Leaf has sprouted and one of the old leaf has grown tall and is almost touching the water level in the above pic. There are now in all 7 Leafs in this grass plant. I need to find the name of this plant. :)


Notice the Brown Algae, has started spreading on the Leaves. I am bringing a Sucker Fish, I hope it will take care of this Algae.


Plate with a blob of tubiflex worms.

Solar Air Pump Rejunevation.


For last 2 years, I have being using a solar air pump for oxygenating my tank. It was working great. But as expected, as per reviews from other forums, the solar air pump stopped working last week. It was already showing sign of fatigue from last few months. The bubbles had reduced drastically.

So finally I opened the air pump to see how it was implemented. I was sure that it consist of a motor, but I was unsure how did they use a motor for pumping air.

So here are the pics of the internal structure of the air pump.


DC 12V Motor.

The Shaft consist of a small disc with a small hole sightly away from the centre of the shaft.

The Piston with 3 black rubber membrane.


The small hole in the shaft is for the pushing the piston of the pump. The pump as shown above consist of 3 small black coloured rubber membrane. 

Since the shaft hole is slightly off centred, the piston(which is at the centre) is held at an angle. Due to which, at a time two of the membrane are contracted where as the third membrane is expanded.

As the shaft moves in circular motion, the piston is also rotated causing each and every membrane to contact and expand. This causes the pumping action and thus the air is pumped.

After playing around with this, I came to a conclusion that probably the rubber membrane had toughened over time of 2 years and hence the DC motor, with low torque, could no longer create a pumping action. 

After some searching over the net, I came to know that petroleum Jelly can be used to soften rubber. And viola, my solar air pump got rejuvenated with some petroleum jelly. :)

Friday, November 18, 2011

Aquarium Setup using Walstad Method.


Aquarium after 1 Month without water change.


After some interesting results of growing Aquarium plants in fine gravel. I moved my attention to try out the Low-Tech Walstad Method.


The Setup:
Here is the under gravel setup:


As you can see in the above image, I have created a L-shape boundary using some scrape marble stones. Aquarium plants would be planted inside this L-shaped Boundary. The boundary is 1 inch in height. This boundary was filled with red soil and normal organic fertilizer (30:60 ratio). So far there is no water in the aquarium. 

Organic fertilizer is the one we get in packets in a normal outdoor plant nursery.

Once the above setup was complete, it was covered with gravel. I preferred the fine white gravel to cover the L-shape and coarser gravel at other places where I wont be planting any aquarium plants.

Planting Aquarium plants: 
Just dig up a small hole in the L-Shaped gravel area and plant your aquarium. See to it that the gravel forms a half inch covers on the soil. If you don't cover the soil then the water will get muddy once you add water to the aquarium. 

The white gravel cover stops the soil from getting into the water column, thus avoiding the water to get red(due to red soil)/muddy. 


Adding Water and Fishes:
Once you have planted all your aquarium plants, you can start pouring water. See to it that your gravel cover on the soil is not disturbed.

Fill up almost 70% of the water. Now you can arrange/add the stones and other aquarium ornamental stuff inside the aquarium. 


You can then let the fishes inside the aquarium.

Here are some more images of the arrangement after 1 month. I forgot to take pics when the first setup was done.


Points to note:


1. The layout of plants is not that great. Need to check up aquascaping concepts.


2. The tall grass kind of plant is showing no signs of growth. It has been in this state for almost 3-4 months now.


3. Amazon and Anubias seems to be thriving good. Cabomba is also showing good growth.


4. Cabomba has a weak stem. Try to keep them in water as long as possible. Ideally plant them at the last, just before filling up the aquarium with water. If you keep them our of water for long in a bend state, they form natural bend for which I do not have a cure. All the new shoots should be fine and will be pointing straight upwards.

5. Once the plants are planted and water has been filled. you cannot change the location of the plant since it will expose the soil and will make the water muddy. It can be a messy experience.


6. I had a problem of Brown Algae in all the previous aquarium setup. That problem is now in control. This could be due to Walstad method or due to less number of fishes (3-Danny and 1 Snail).   


Saturday, September 10, 2011

Planted Aquarium After 2 months.

Planted Aquarium After 2 months.
Anubias and Amazon seems to be growing fine with some new baby leaves. 
Cabomba(with roots) has shown around 1-2 inches of minuscule growth. I got some more Cabomba which has no roots and they seem to thriving better in my tank, showing almost 1-2 inches of growth in 2 months. 


Weekly 20% water change facilitates new growth, seems like my tank is low on some dissolved nutrients. Need to work on this aspect.


I lost all my snails (4) expect 1, seems like the ecosystem had gone bad.

Aquarium Fertilizer - Something to try out.

For fertilizer heat 3 cups of water to boiling in a large jar or measuring cup. Add the following and stir until dissolved:
  1. 1/4 cup of potassium sulphate
  2. 1/4 cup of epsom salt (magnesium sulphate)
  3. 1/8 cup of potassium nitrate (salt peter)
Put this into a 750ml bottle and keep in a cool place. Sometimes crystals may form if its in the fridge so I add a half tsp of muriatic acid and store it on my shelf.
  • Add 1 tsp of this for each 5 gallons of aquarium water on startup.
  • Each time you change water, add 1 tsp of this for each 5 gallons of water you replace.
  • On startup, add 2 tsps of calcium carbonate for each 10 gallons of aquarium water. SKIP this if your tap water is over 4 GH general hardness.
  • Each time your change water, add 1 tsp of calcium carbonate for each 10 gallons of aquarium water you replace. SKIP this if your tap water is over 4 GH general hardness. See notes on GH.
  • Note that the fertilizer contains no trace nutrient additions. These are provided primarily by your soil.
HINT: mix the calcium carbonate with a jar of water and add this at night around lights off time. It will stay cloudy for several hours. A light layer will also be deposited on the plant leaves but this dissolves slowly by the action of dissolved CO2 in your water.


Courtesy: http://home.infinet.net/teban/how-to.html

Sunday, July 3, 2011

Planted Tank - Notes.

The best place to start is by considering the following parameters that are important when choosing lights for a planted tank.
  1. Intensity of light is more important than spectrum
  2. Aquatic plants use light in the red and blue areas of the spectrum most efficiently. They are less efficient at using green and yellow light, but they are also capable of using even this part of the spectrum as long as the intensity is adequate.
  3. Red light encourages long, �leggy� growth, while blue light encourages compact, �bushy� growth.
  4. Algae is much better at using poor-quality light than higher plants are, so strong light in the wrong spectrum can encourage algae problems, particularly in a tank with nutrient imbalances of one sort or another.